What is prompt management?
Prompt management helps you create, version, share, and deploy prompt templates easily. Instead of hardcoding prompts in your application, you can manage them centrally, collaborate with your team, and monitor their performance.Why use prompt management?
Instead of hardcoding prompts in your application, reference them by ID.Use prompt management
1. Get your Keywords AI API key
After you create an account on Keywords AI, you can get your API key from the API keys page.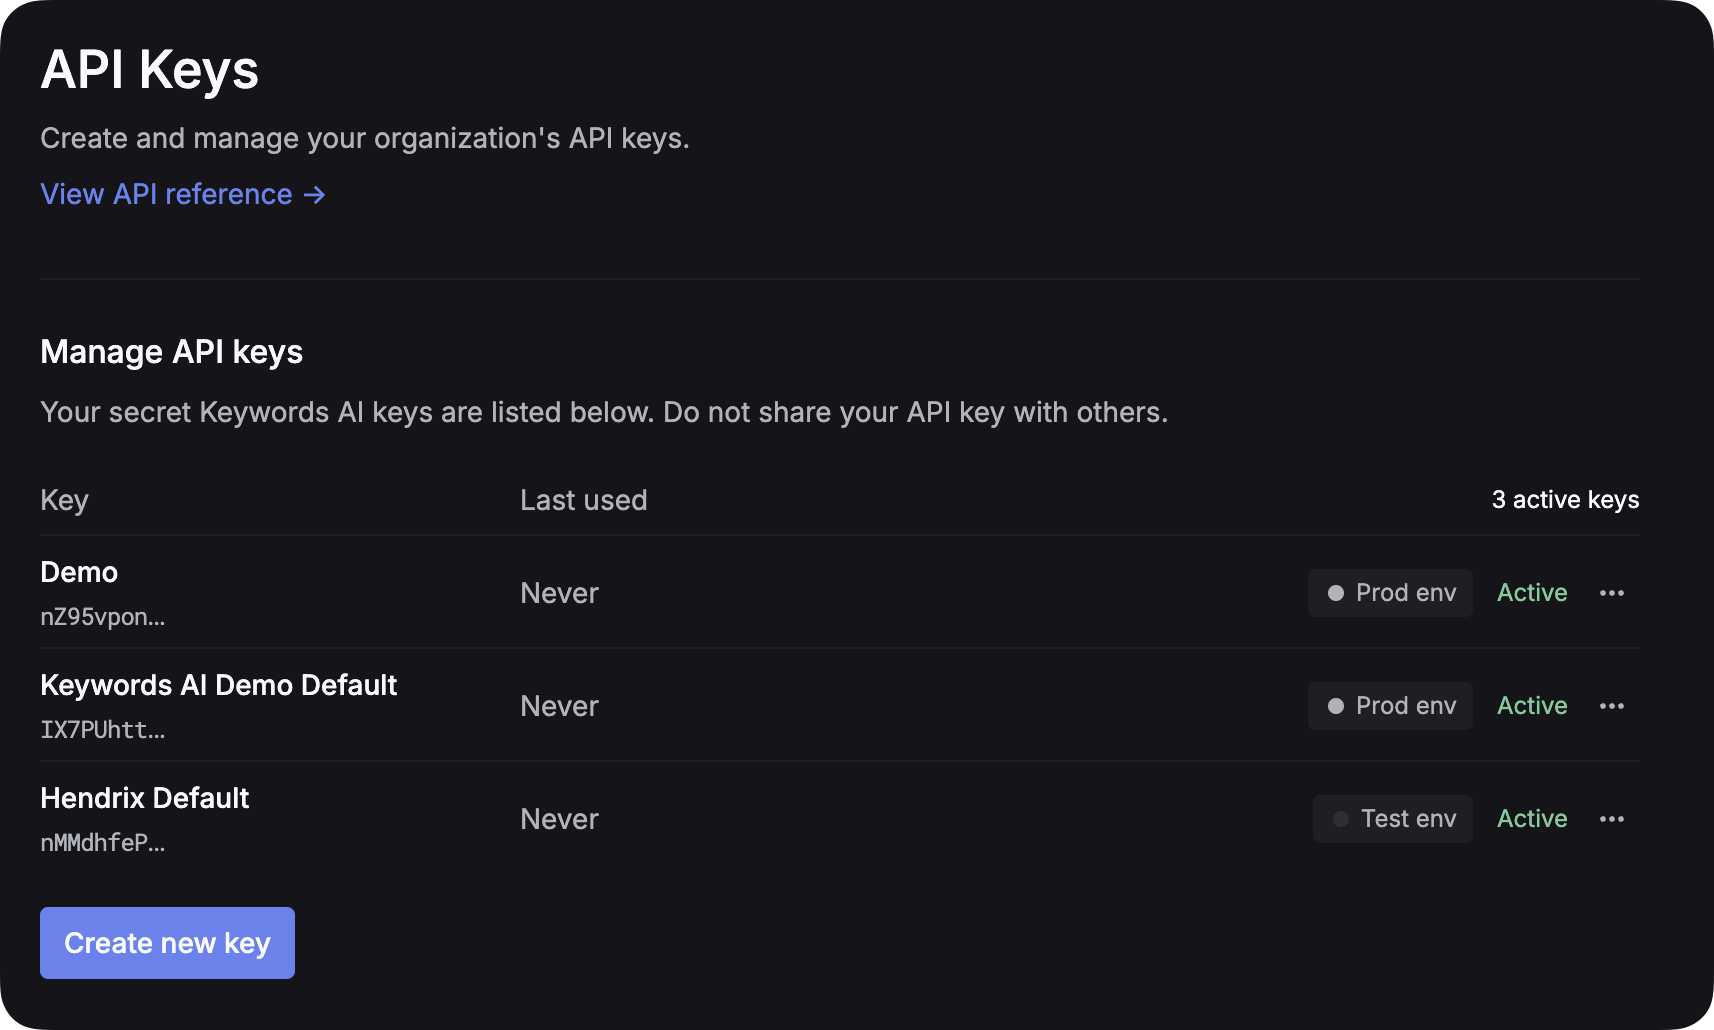
2. Set up LLM provider API key
For all AI gateway users, you have to add your own credentials to activate AI gateway. We will use your credentials to call LLMs on your behalf.
3. Create your first prompt
Create a new prompt
Once you have signed up and created an account, you can create a new prompt on the platform. Go to the Prompts page and click on the “Create new prompt” button. You should name your prompt and could add a description to it.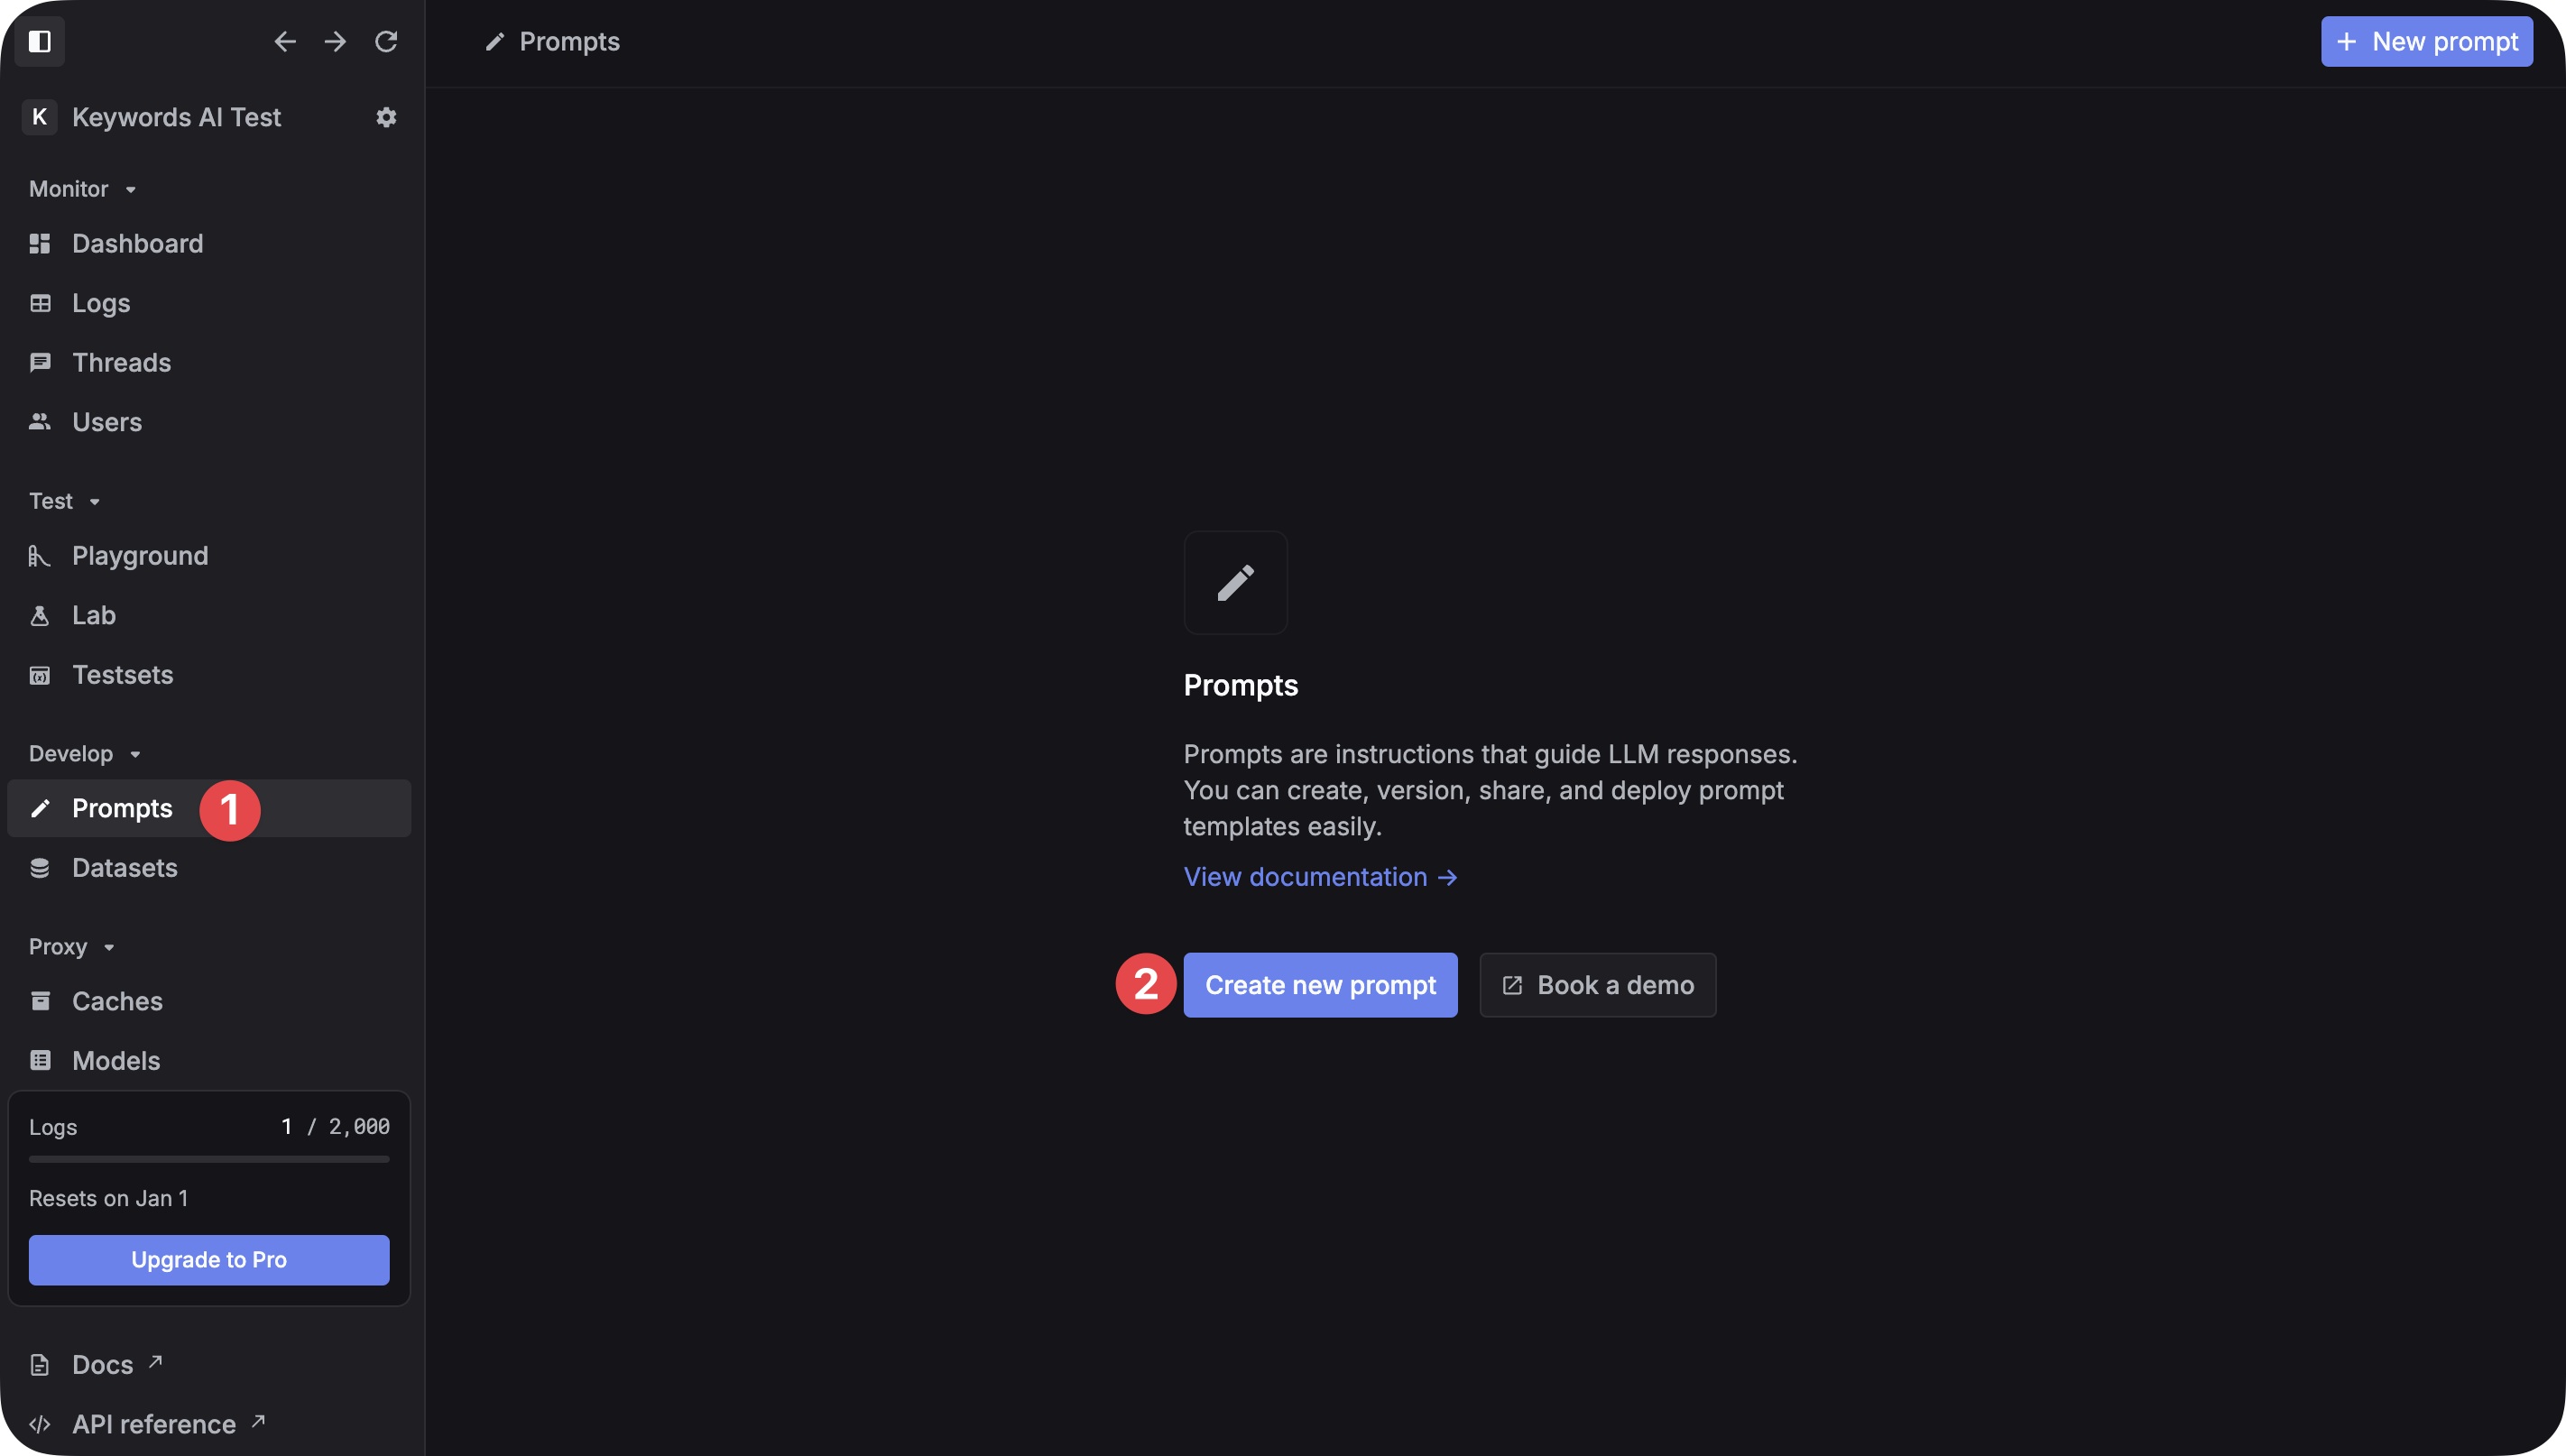
Configure the prompt
Once you have created a new prompt, you can configure it. Go to the 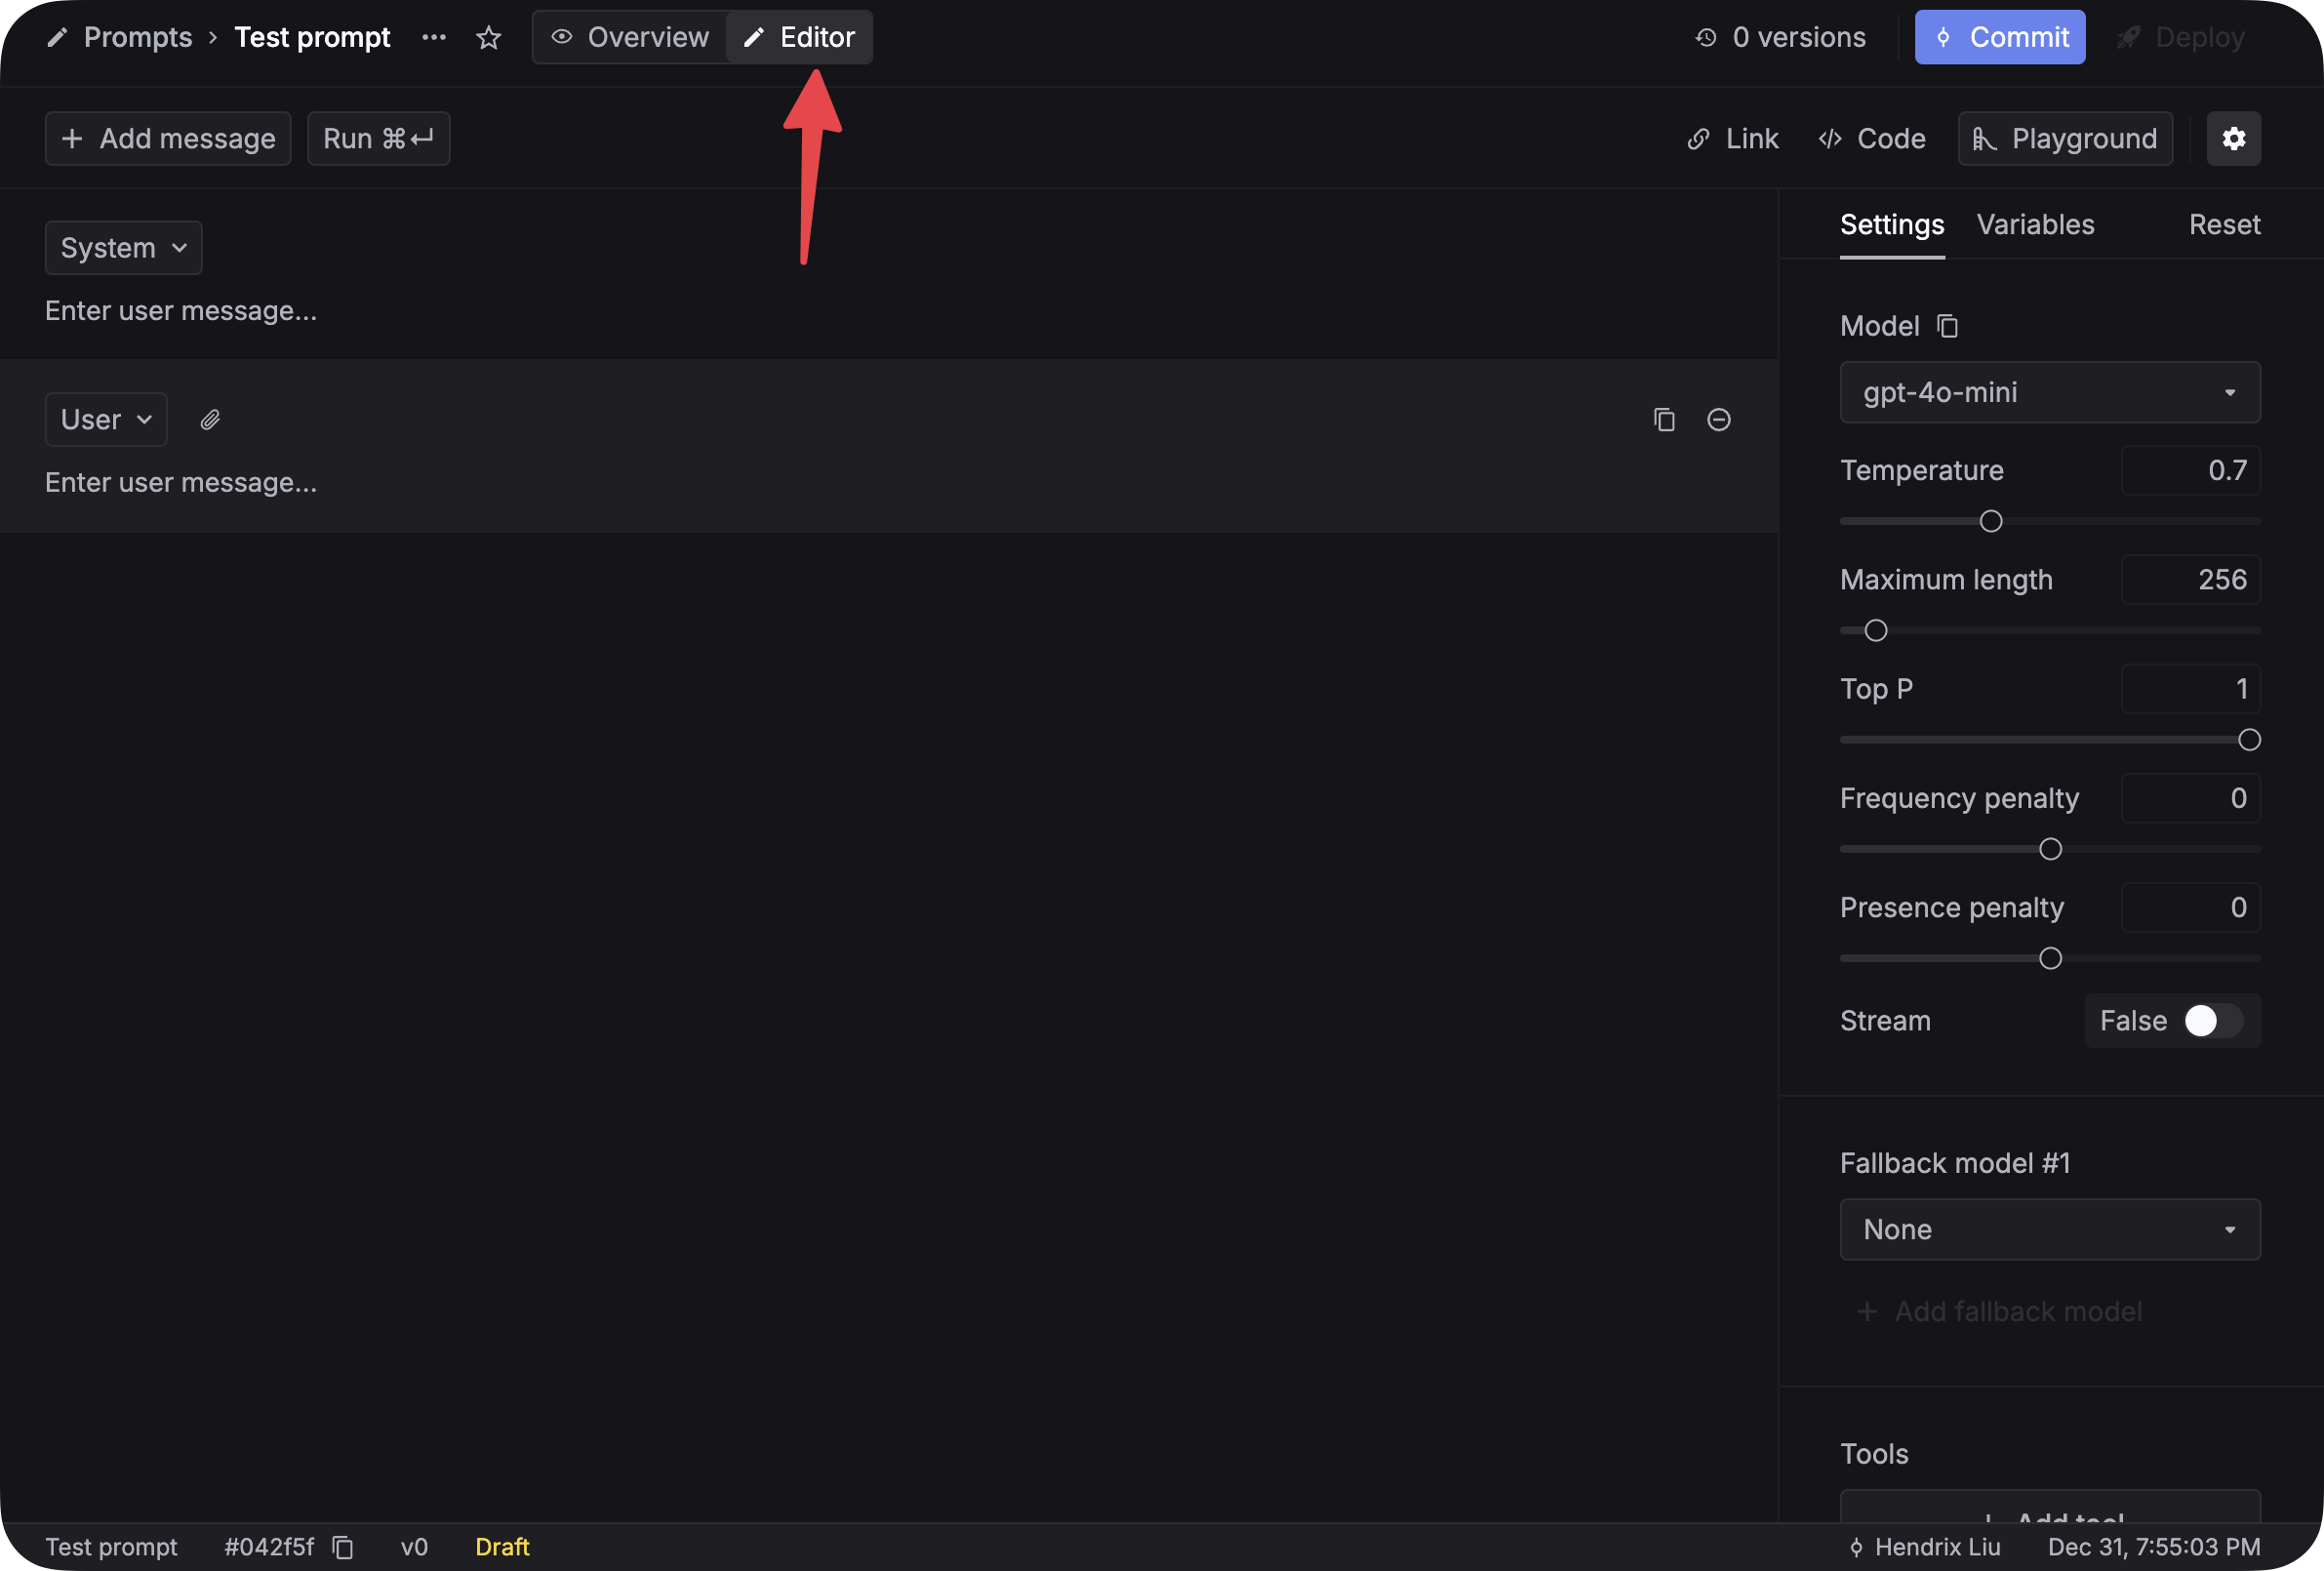
Editor tab and you can begin to write your prompt. The right side of the screen defines your prompt. You can set parameters like Model, Temperature, Max Tokens, and Top P. You can also add function calls and fallback models to your prompt. Check out the details here.Write the content
Once you have configured your prompt, you can write the content of your prompt. Click on the 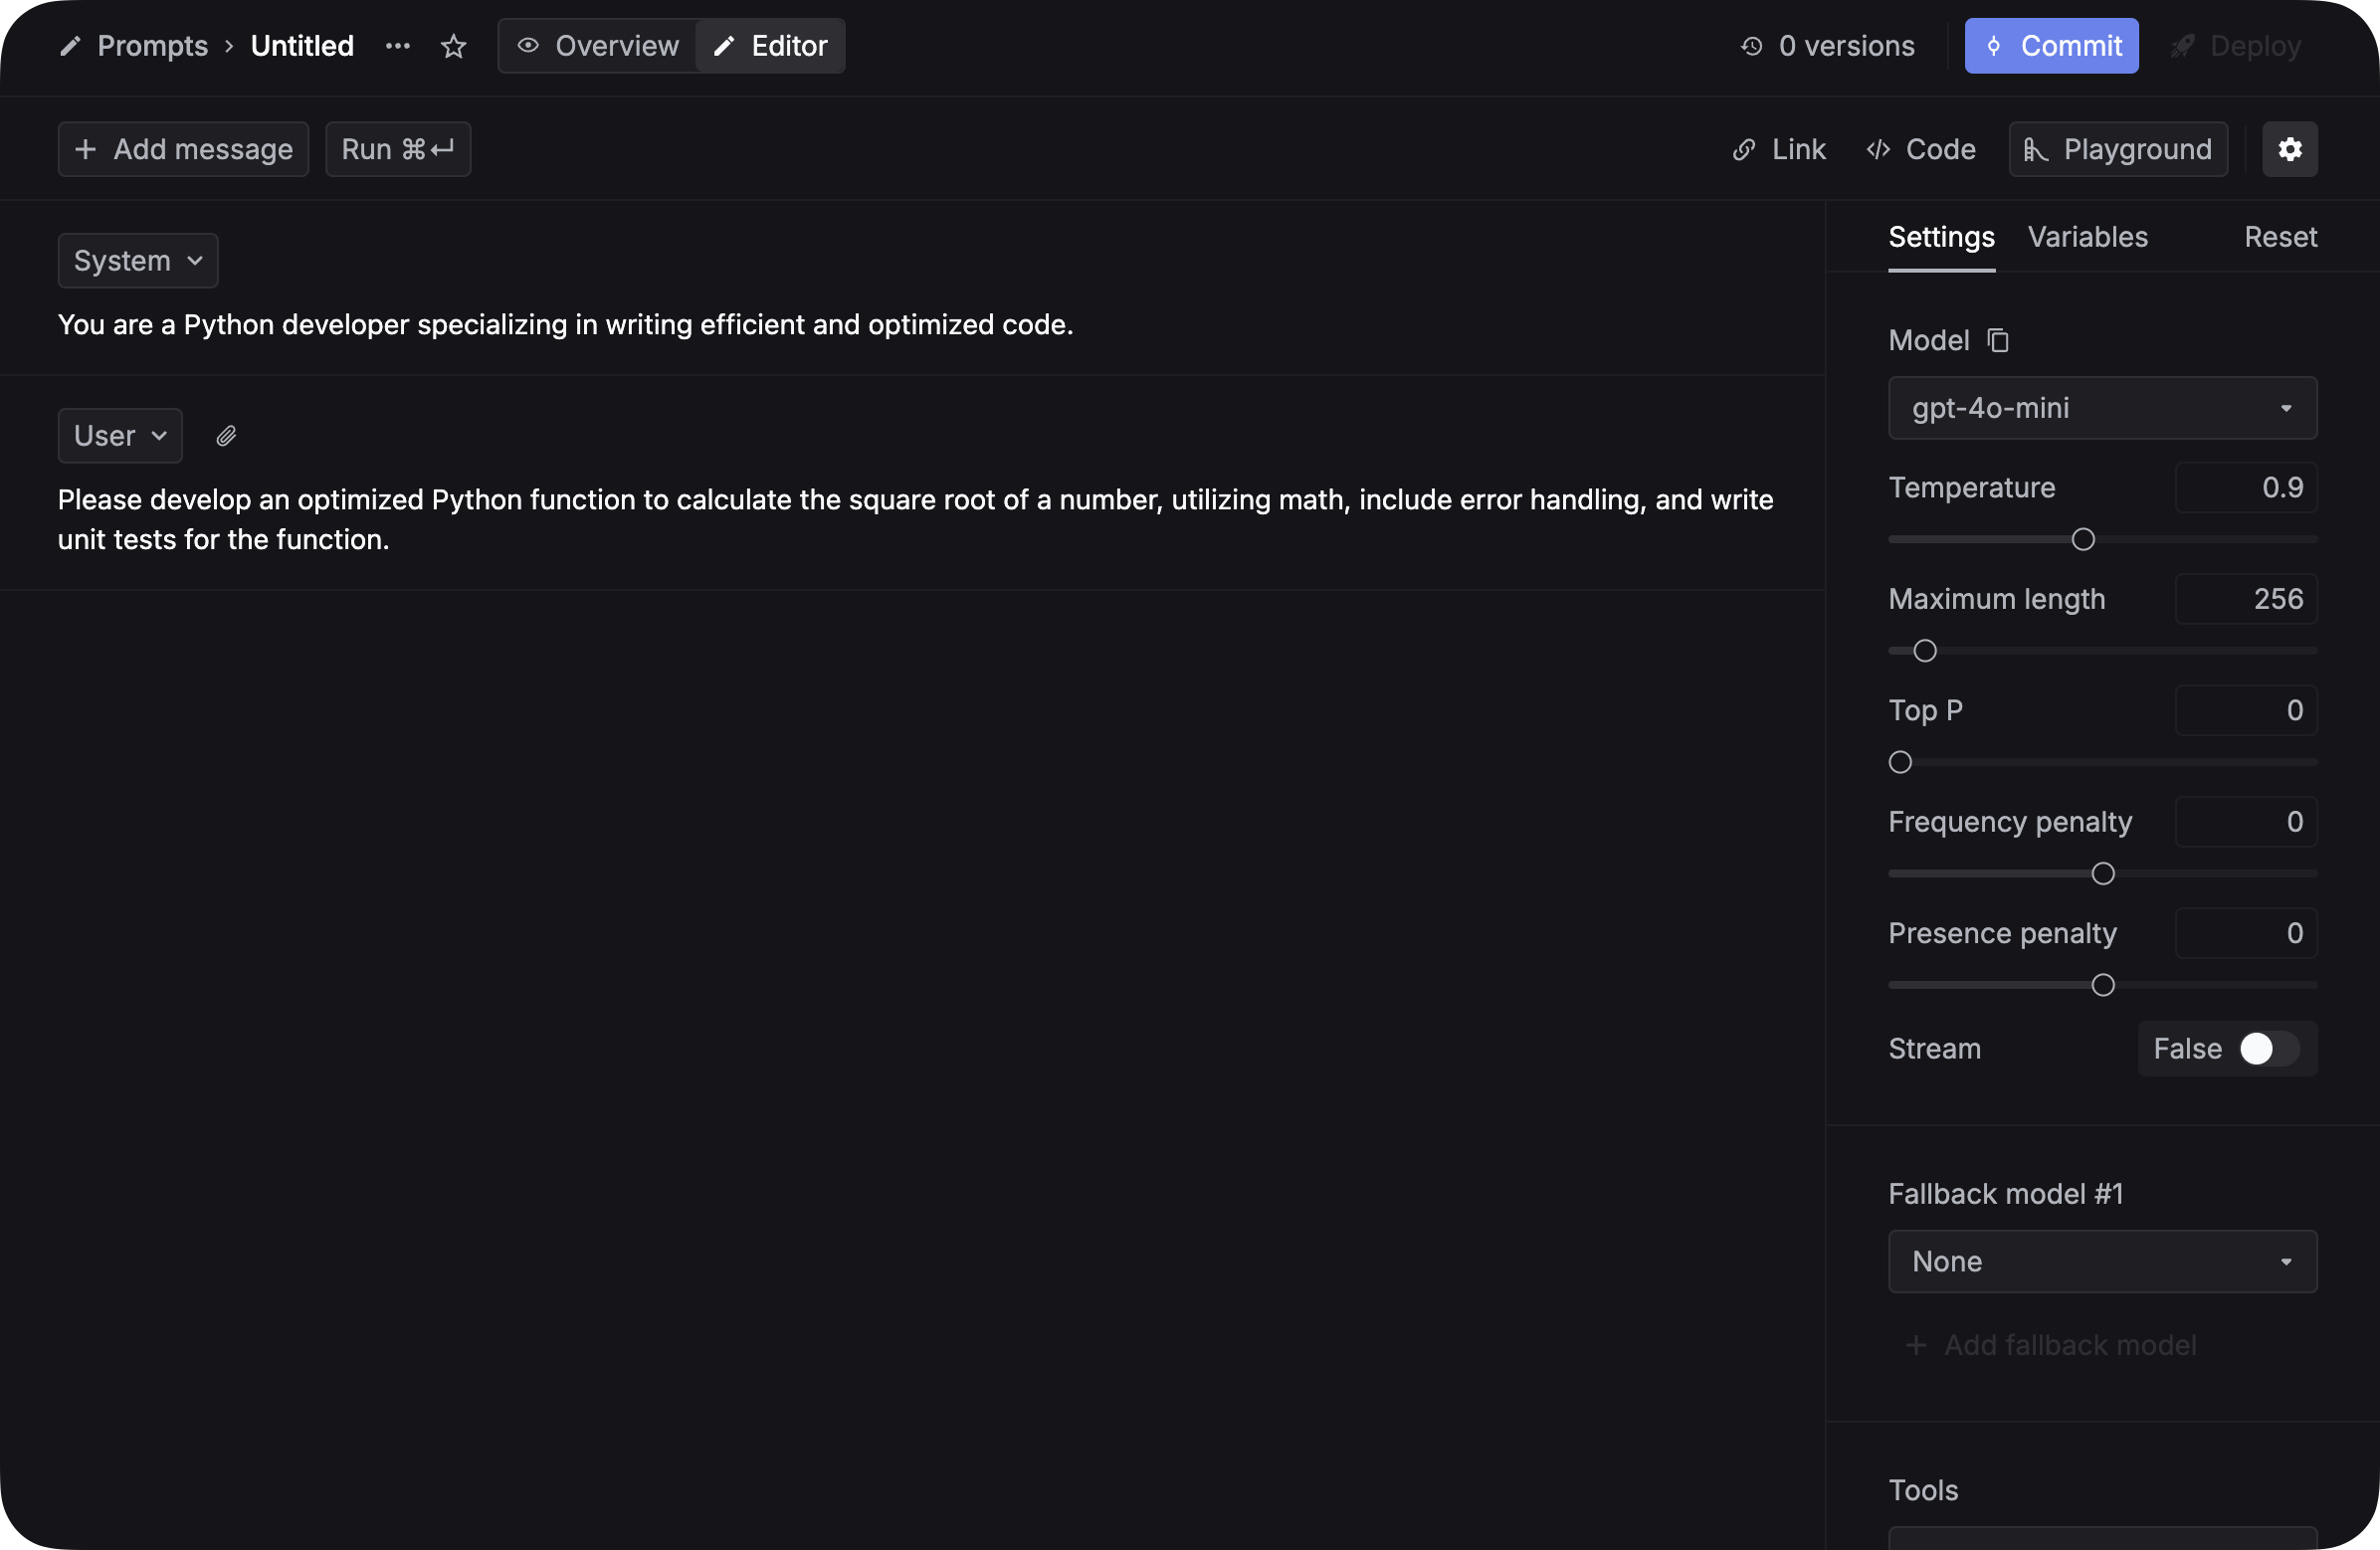
+ Add message button to add a new message to your prompt. You can change the role of the message to user or assistant by clicking on the role name.Variables in the prompt
You can also add variables to your prompt. Variables are placeholders for dynamic content that can be used to generate prompts. Simply add double curly braces 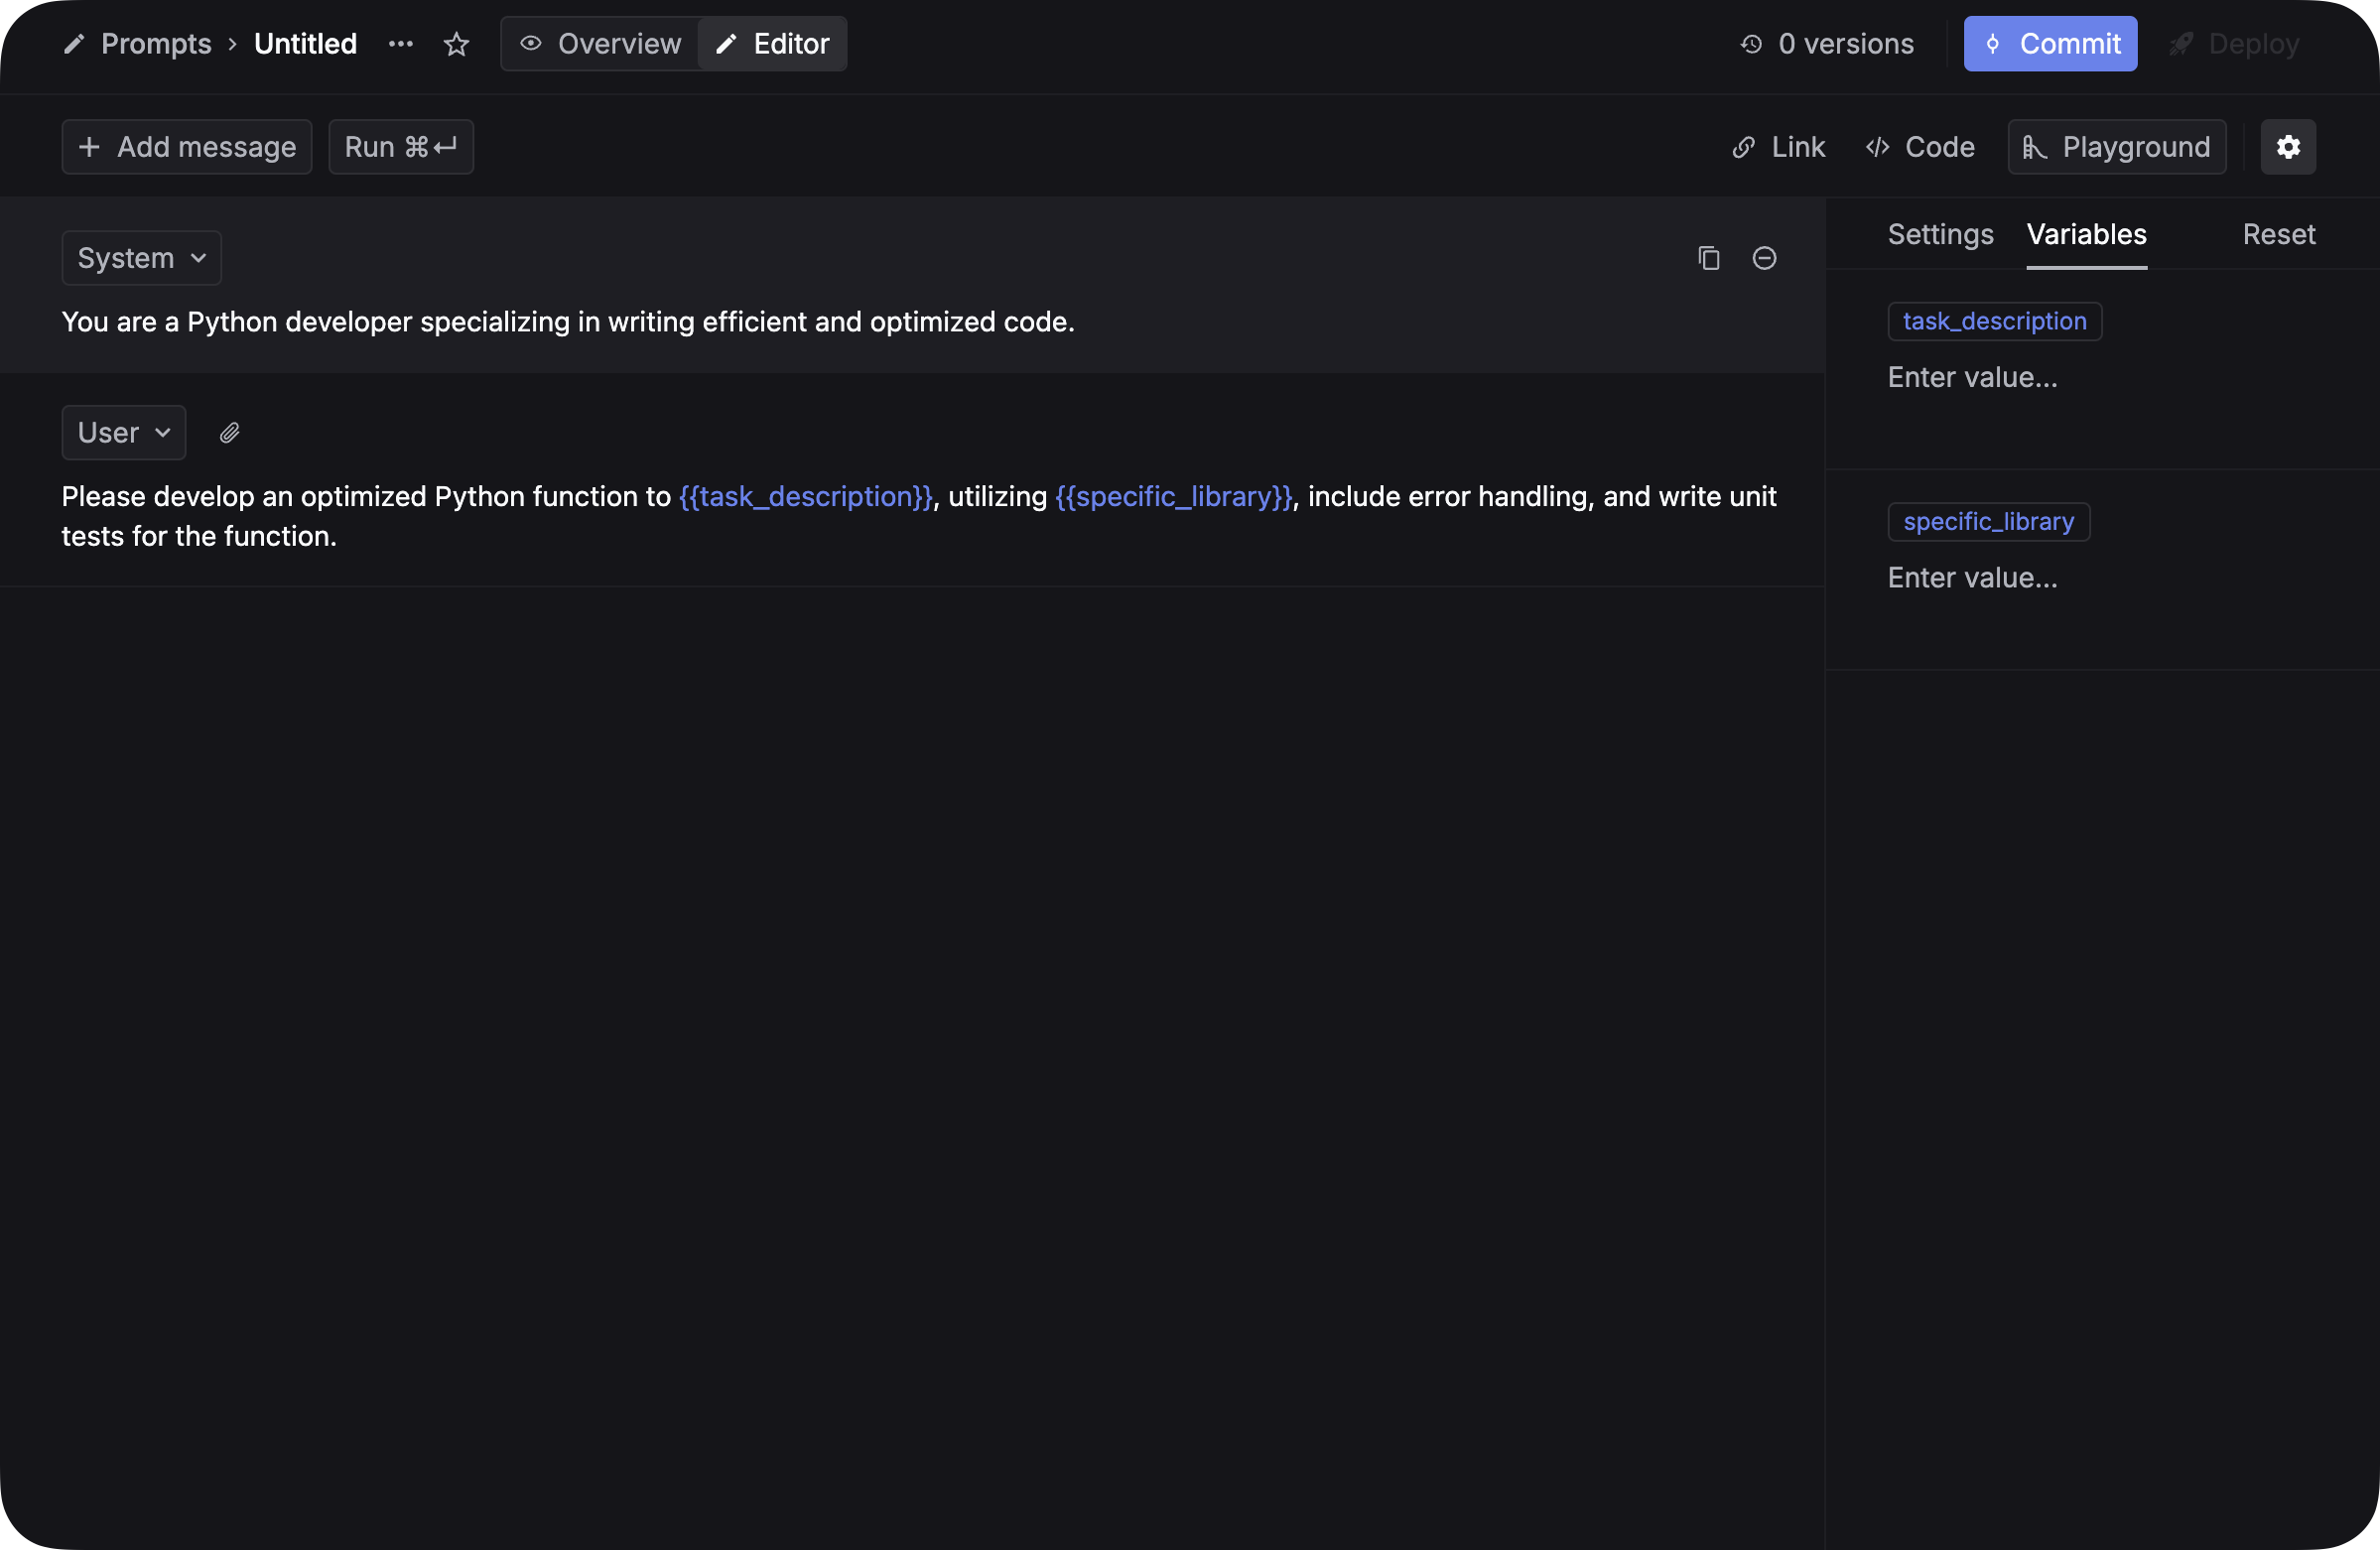
{{variable_name}} to your prompt and you will be able to use the variable in your prompt.Replace the User message with this:The format of the variable can’t be
{{task description}}. It should be {{task_description}} with ”_” instead of spaces.Commit the first version
After did this, you can: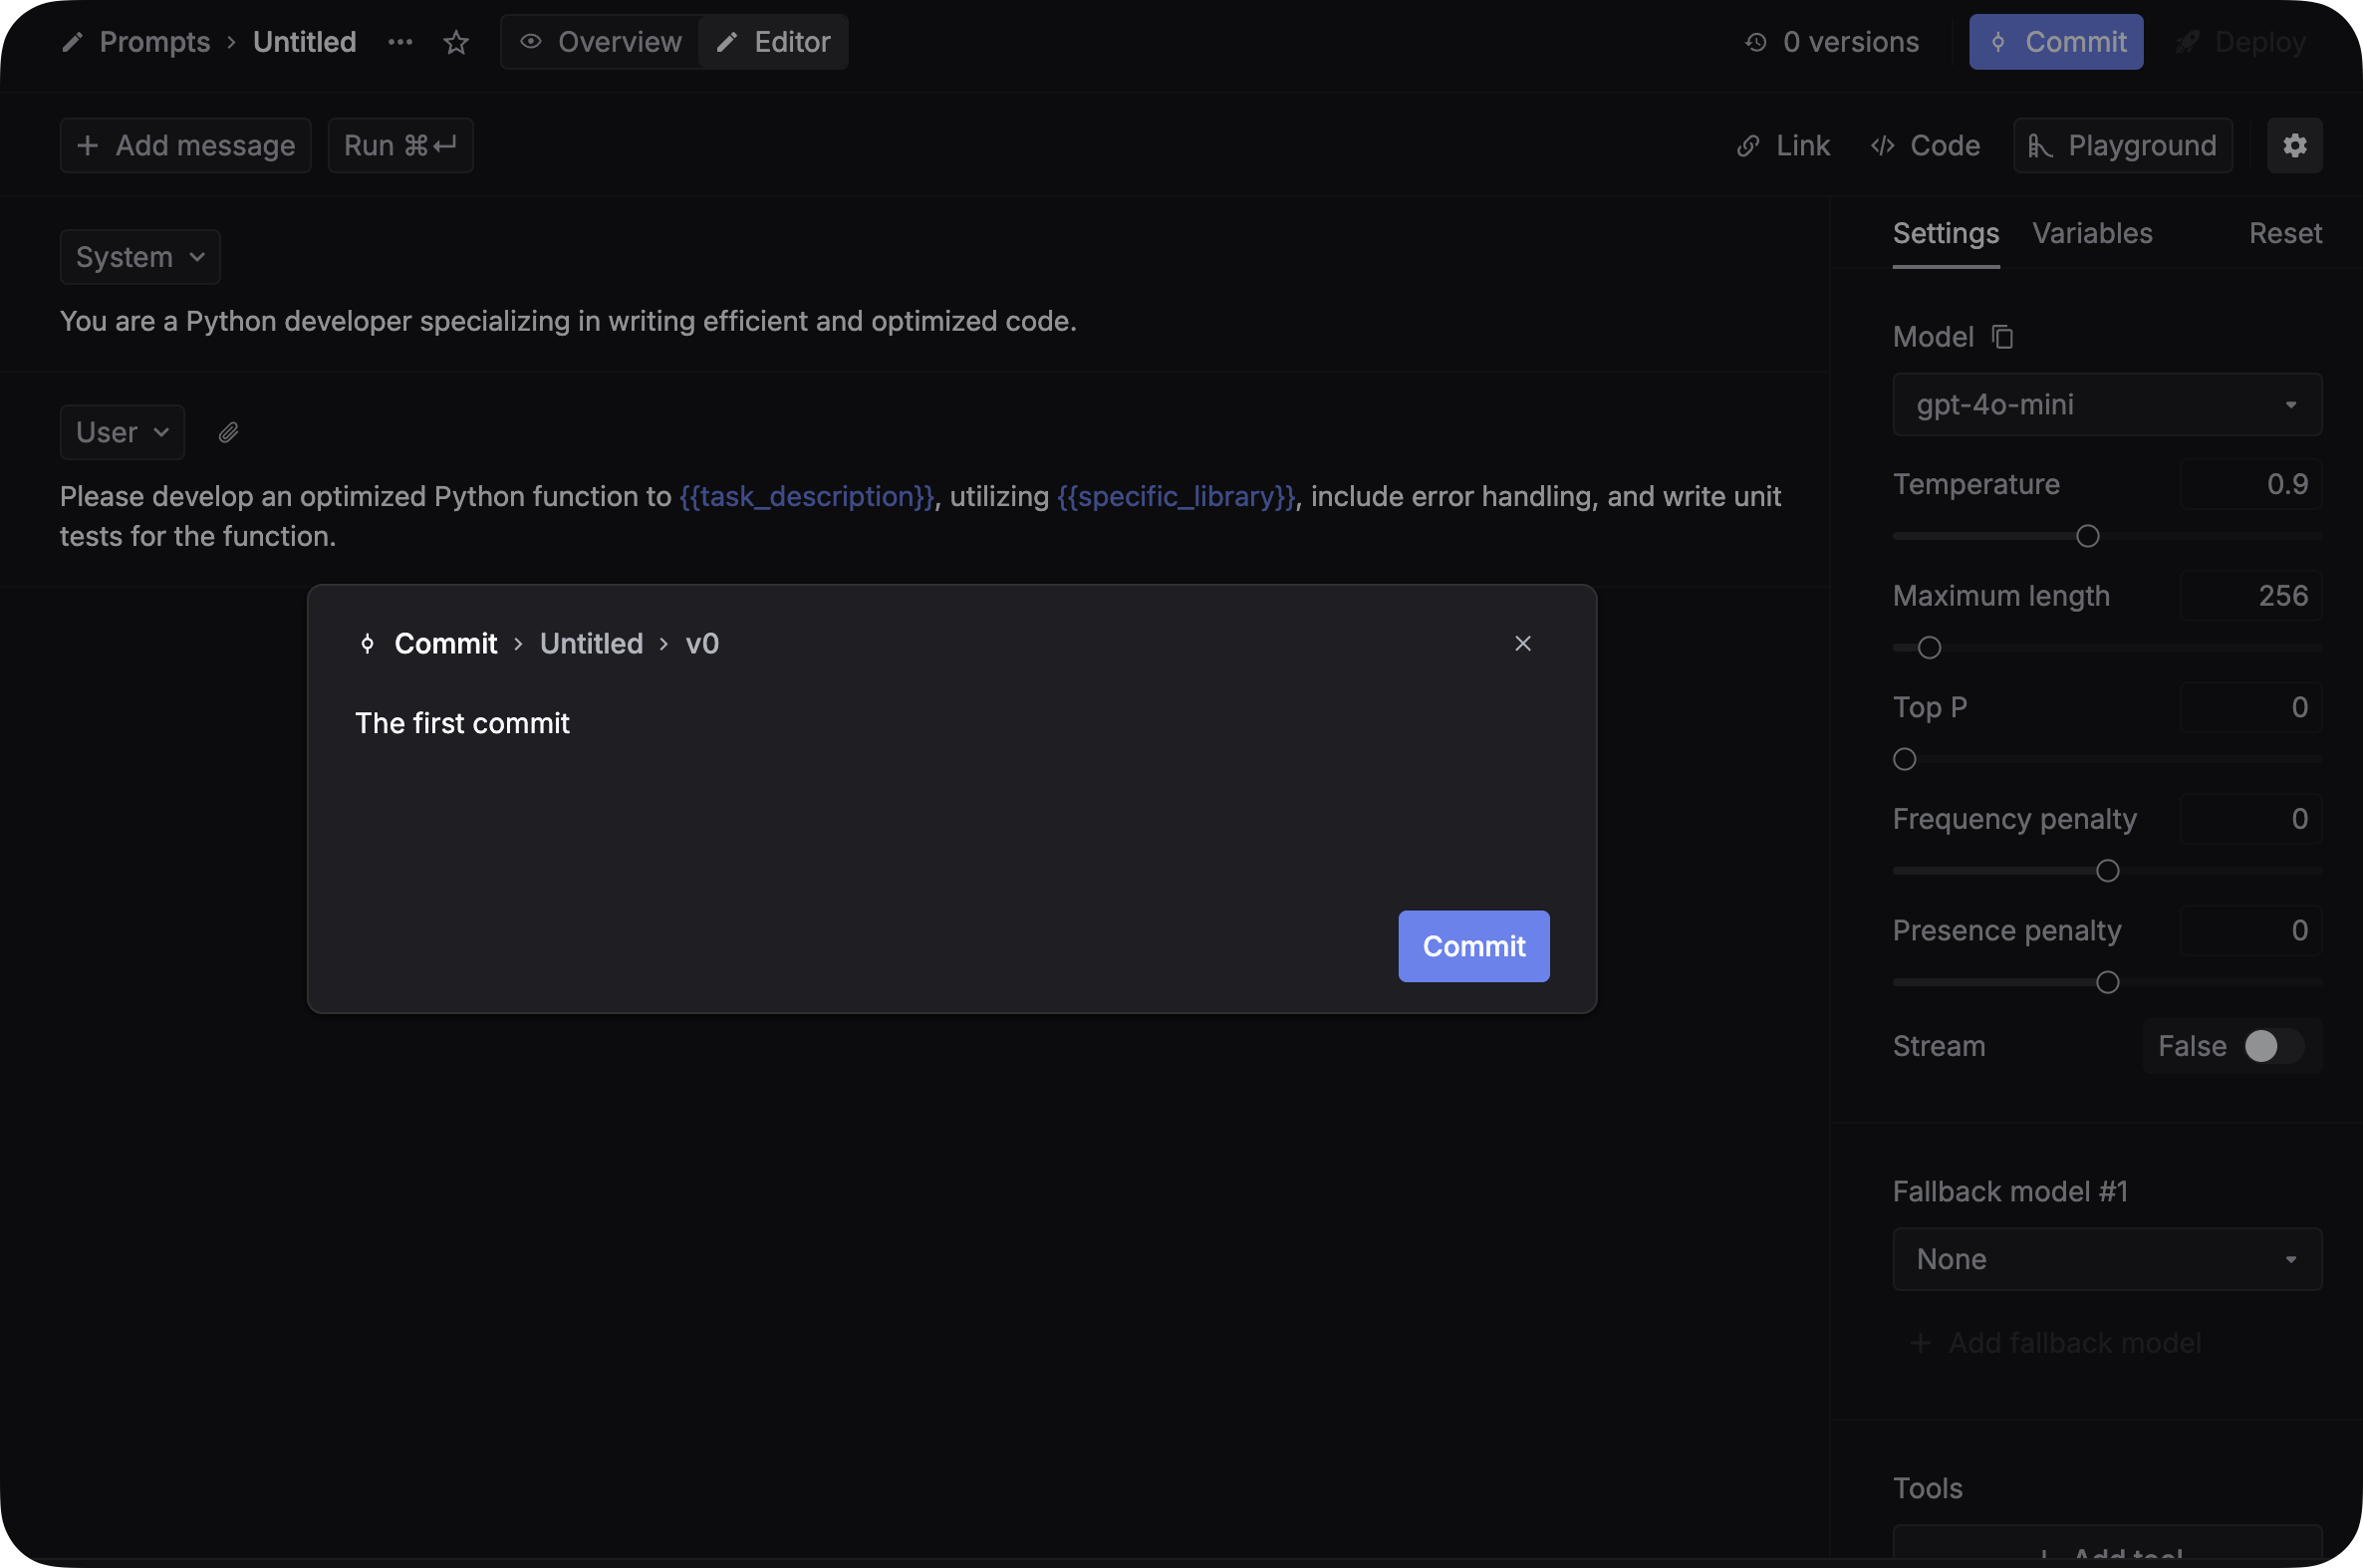 Congrats! You just created your first prompt on Keywords AI platform.
- Add a value for each variable in the
Variablestab. - Click
Runto test your prompt.
Commit button and write a commit message, which is helpful for you to track the changes you made to your prompt.Congrats! You just created your first prompt on Keywords AI platform.
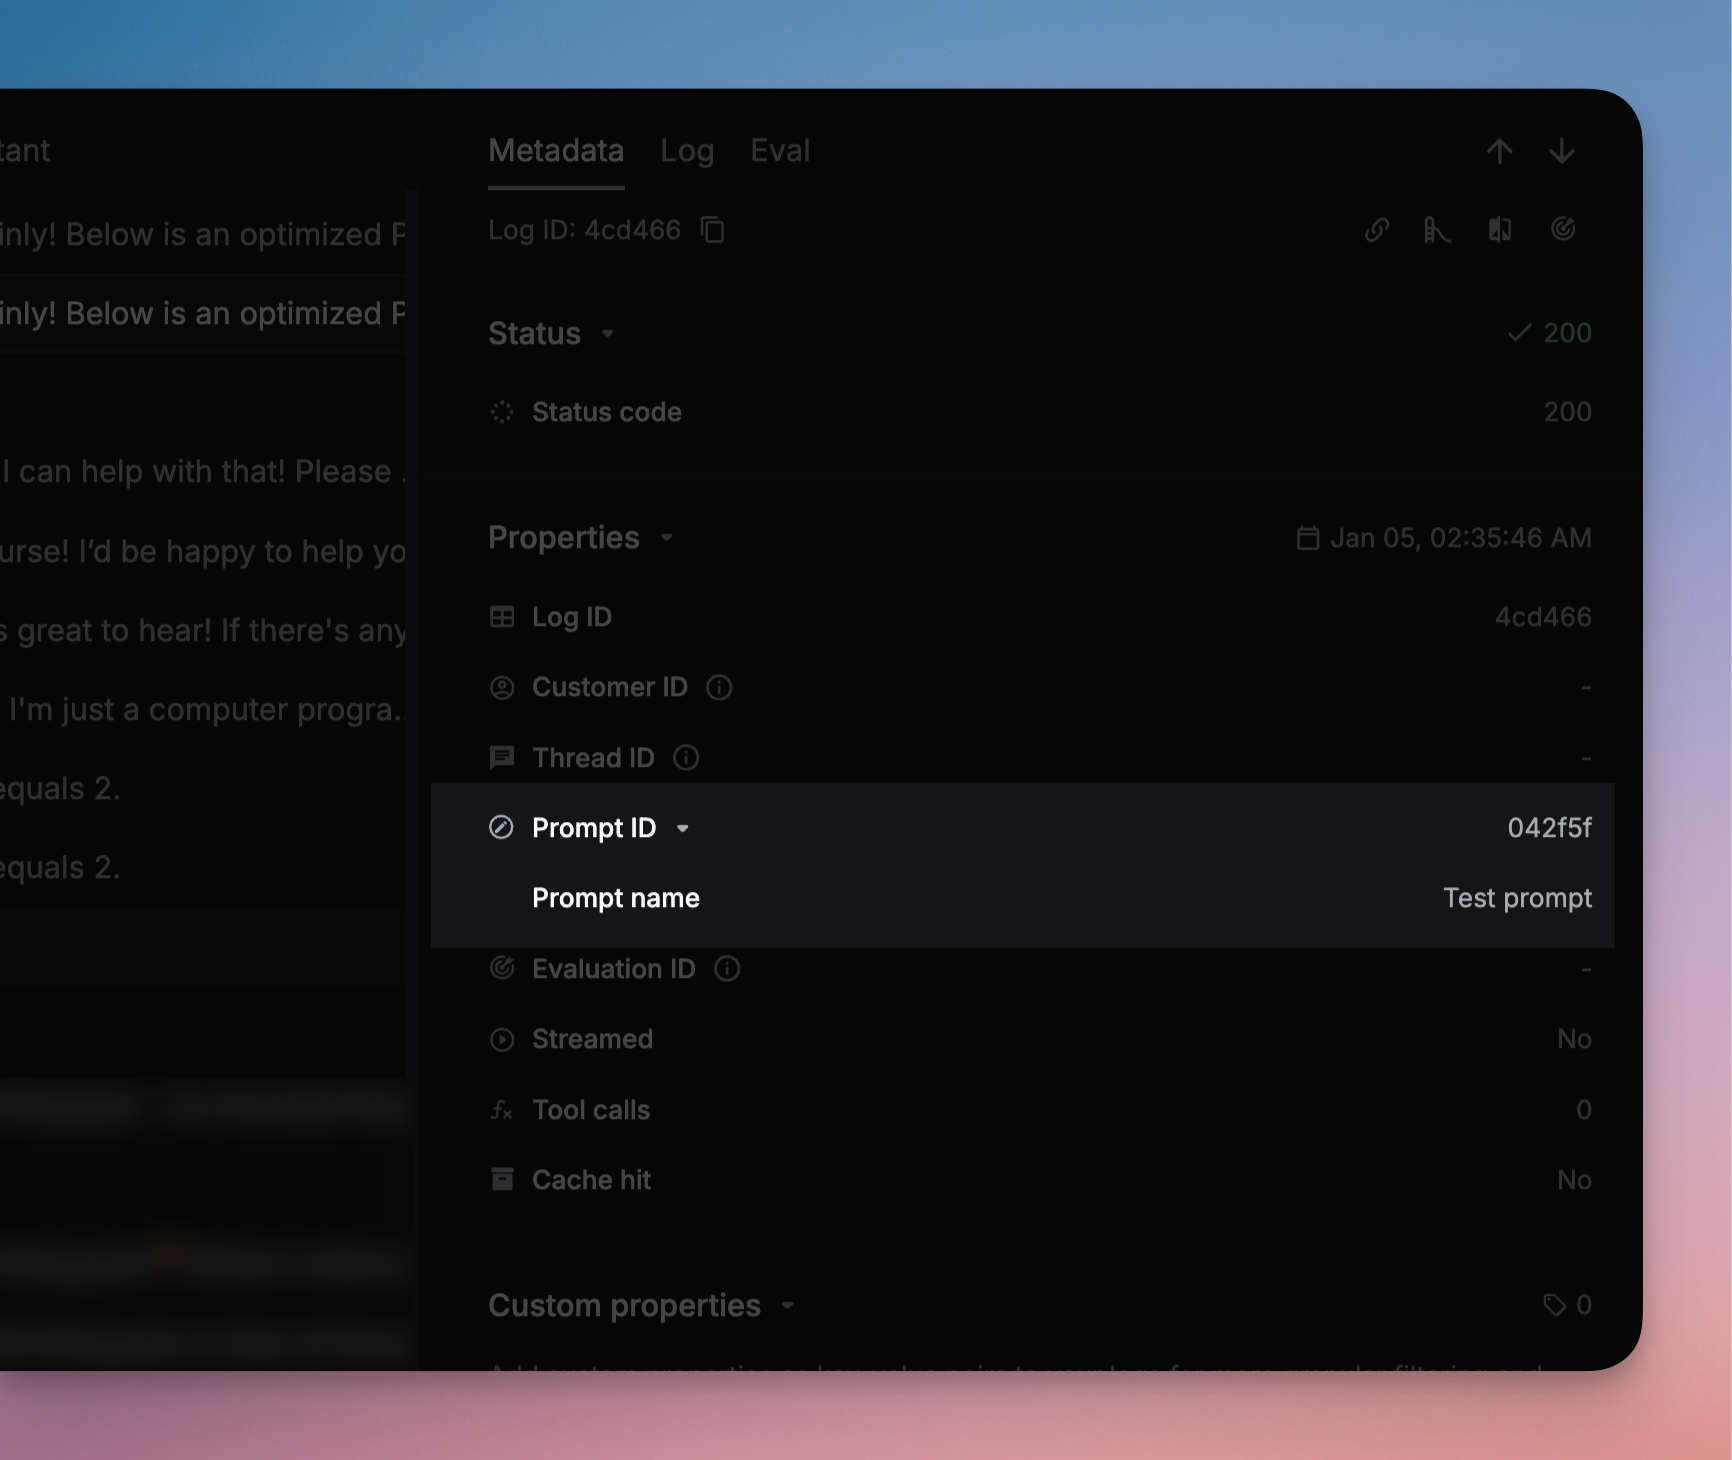
4. Find your prompt ID
After creating your prompt, you’ll need its ID to use it in code. Find the Prompt ID in the Overview panel on the Prompts page.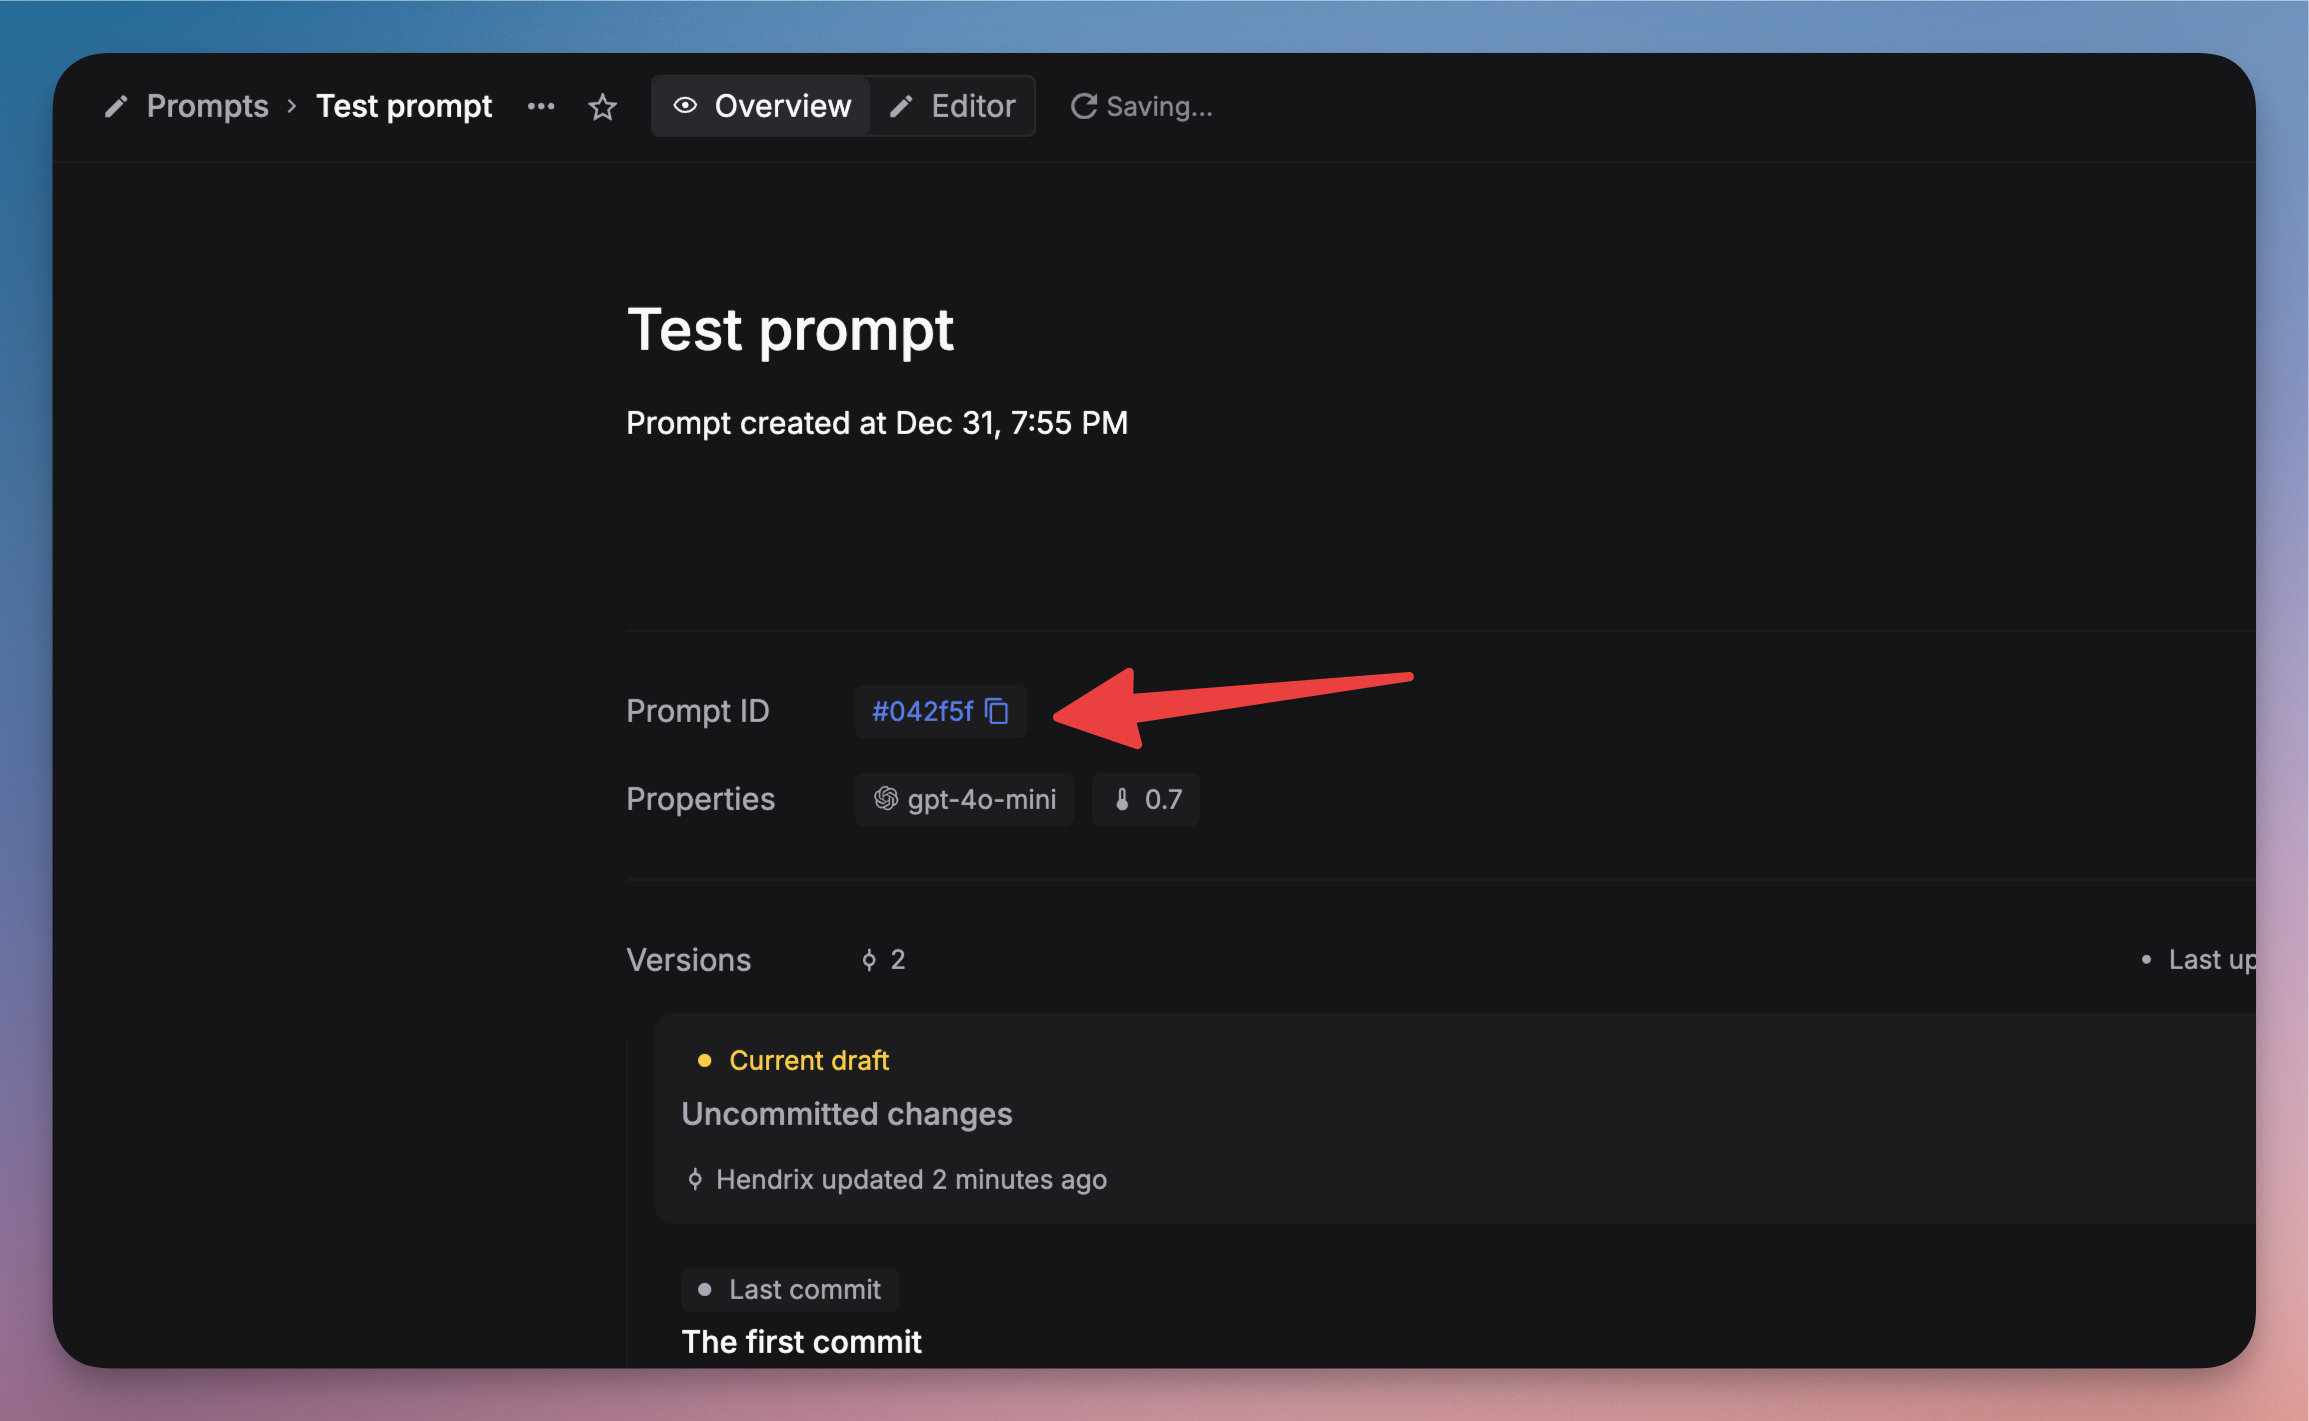
5. Use your prompt in code
Now you can call your prompt from your application using the Keywords AI API.- OpenAI Python SDK
- OpenAI TypeScript SDK
- Standard API
6. Monitor your prompts
View your prompt usage and performance on the Logs page. You can:- Filter logs by prompt name
- See response times and token usage
- Debug individual prompt executions
- Track prompt performance over time